
 Sign In

How to sew Myrtle in a woven fabric
If there’s one thing I like best about Myrtle, it’s that it is one of those rare patterns that can be sewn in either knit or a woven fabric.
The reason for this is the ease and drapey fit. Myrtle is designed so that shaping comes from the comfortable and stretchy elastic waistband, rather than the tight fit of the fabric.
While the pattern instructions that come with Myrtle are for knit fabric, switching to a woven is super easy. In this post, I’ll summarize the few changes you’ll need to make if you’re using a woven fabric.
And to make things super clear, you can download a free complete extra set of instructions for woven fabrics. This walks you through every step in the process, but assumes you’re using a woven fabric rather than knit.
(If you buy the digital version of Myrtle, you’ll get this automatically with your download as a bonus.)
Woven fabrics you can use
Myrtle works well in fabrics that have a bit of drape to them. You want the neckline in particular to hang well, rather than stand away from your body too much.
You have a wide array of fabrics to choose from. Here are a few that I think would be particularly lovely:
- rayon challis
- silk or rayon crepe
- lightweight linen
- light chambray
- seersucker
- wool crepe
- cotton lawn (choose one that’s not too stiff)
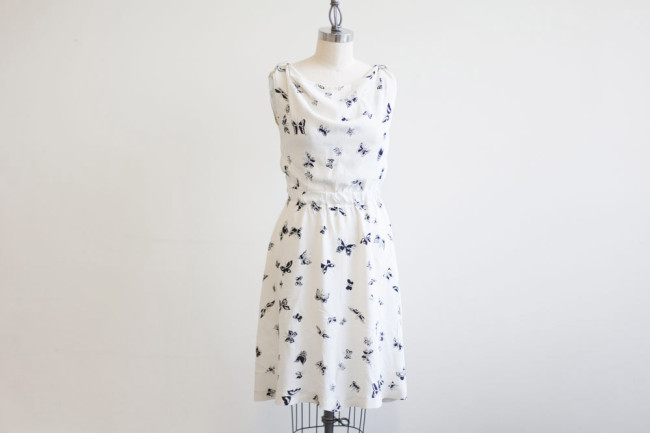
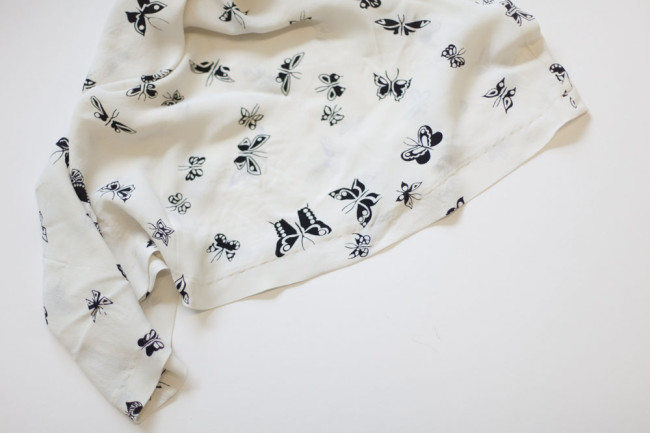
For this sample, I used a vintage silk crepe. For the blue and white sample we showed yesterday, we used a light silk twill.
If you have a dressform, try draping some fabric on the form to see how it hangs. It’s very easy to replicate the look of the cowl with some quick draping, and you’ll instantly have a good idea of what the dress will look like.
Extra supplies you’ll need
There are just a few extra things we’d recommend for making Myrtle in a woven fabric:
- 1 yard of 1/4 inch double fold bias tape. This is for finishing the back armholes and back neckline. While these curves can just be turned and hemmed in a knit fabric, wovens are not as flexible and should be finished with bias tape as a facing instead.
- Universal needles. You don’t need a ballpoint needle if you aren’t sewing knits, so grab a universal needle. Be sure to match the needle size to your fabric.
- Fusible interfacing. This is just for interfacing the shoulder tabs if you are making them, so a small scrap will do.
Stitching and finishing
The most obvious way this pattern is different in a woven is that you don’t need to use a stretch stitch. You can do all the seaming and topstitching with a straight stitch.
Since you won’t be sewing this with a serger in a woven, you will need to finish all of the raw edges after sewing each seam. And of course, you’ll need to press them as well. Stitch, finish, press, just like you do with most woven garments.
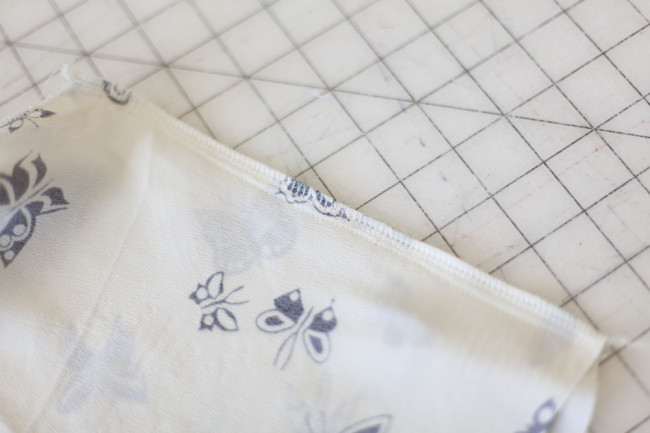
Here, I stitched with a straight stitch, then finished the edge with a serger.
Finishing the back openings
For knit fabrics, the back armhole and back neck are finished by simply turning and hemming. Unlike wovens, you can hem curves this way with knits if the curve isn’t too severe.
For wovens, you’re better off using bias tape. You can either make your own bias tape from the self fabric, or use pre-made. Since it will be on the inside of your garment, a pre-made bias tape will often be just fine.
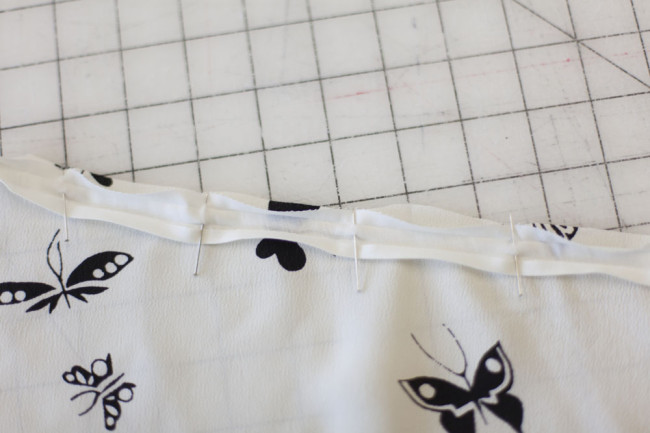
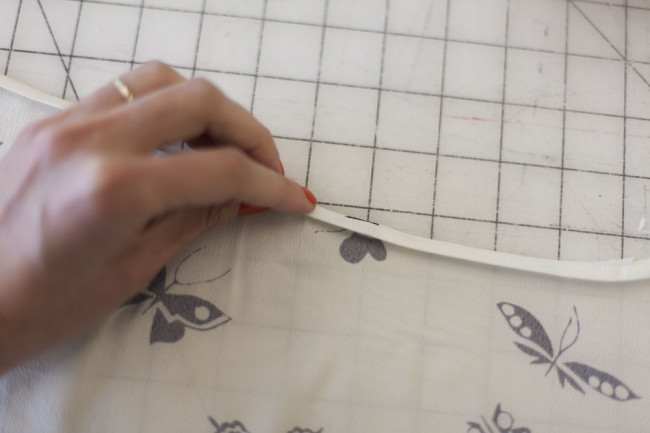
When the pattern instructs you to finish these areas, begin by pinning the bias tape along the edge, right sides together with edges aligned.
Stitch along the first fold line.
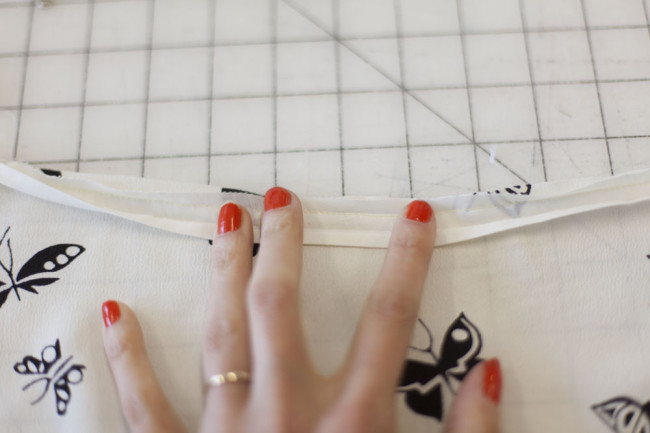
Fold the bias tape to the inside of the garment, folding the bias tape in half to enclose the raw edges.
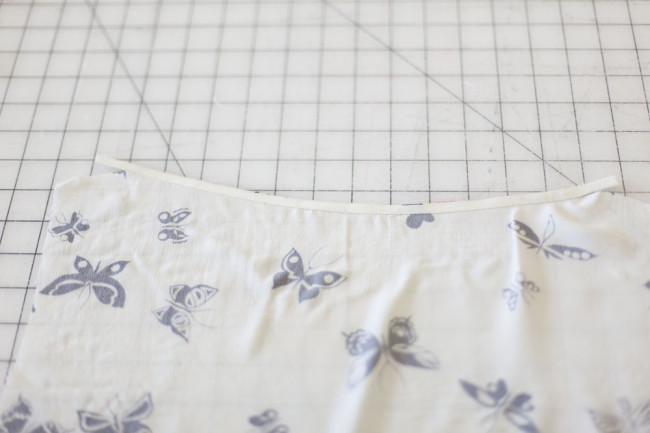
Edgestitch the bias tape in place. Notice that the folded bias tape is acting as a facing, not a binding. It’s turned all the way to the inside rather than wrapping around the edge.
Use this same technique on both the back neckline and back armholes.
Another cool thing about this pattern is the way the front bodice is self lined, so you don’t have to bind anything in a complete circle. This makes binding much, much faster and less fiddly.
Shoulder tabs
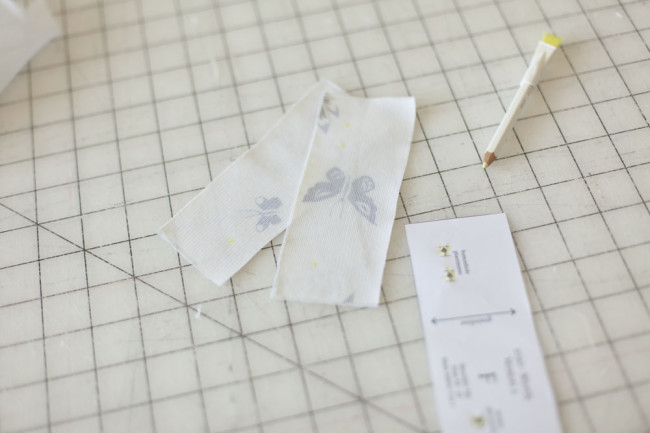
If you’re making the shoulder tabs for this dress, we recommend using a bit of fusible interfacing to give them more stability.
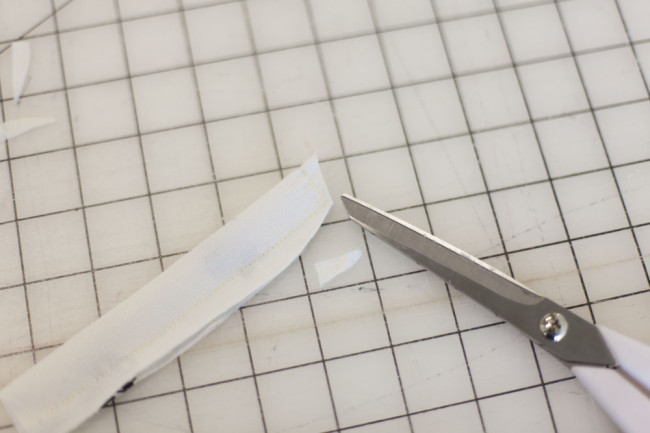
After you sew the tabs with right sides together, clip the corners. Turn right side out, press, and edgestitch around all the edges to help the tabs stay flat.
Hemming
There’s no need to use the twin needle technique or a coverstitch to hem a woven fabric.
Instead, you can sew a simple turned hem by turning 1/4 inch and pressing, then turning again 3/8″, pressing, and edgestitching in place.
Better yet, sew a blind hem. A blind hem will give you a very neat finish. It’s my personal fave.
Comments
Za
July 16, 2014 #
I’ve read or heard before that when going from knit to woven (or the other way round), one could or should choose a size up or down. I’m right in the middle of the measurements chart here and can’t see any difference as what size I should choose. Is that ok?
gabriel ratchet
July 16, 2014 #
my guess at this is the constraining factor is going to revolve around getting myrtle on and off – if you’re pulling it on over your head, the waist – stretched out – is going to have to get past your shoulders/chest. pulling it up, you’ll have to get the neckline and waist over your hips. also, the general rule of thumb is that it’s easier to take things in than try to let out what you’ve cut off, and these are narrow seam allowances. i’d cut the larger size if i were between measurements.
sarai – i’ve solved my “i want it printed” problem with a few supplies from levenger.com, and a few printer cartridges. but any time i have a choice between purchasing a paper pattern or publication and a download, i’ll continue to choose the tangible over the download. despite the extra investment. (just a little unasked for input from this tiny market segment)
Sarai
July 16, 2014 #
I might be misunderstanding your last comment, but this pattern is available as both printed and download, so you have your choice. Or were you referring to something else?
gabriel ratchet
July 16, 2014 #
didn’t mean to be confusing – just a comment in general, since when you’ve asked for feedback in the past – like the wardrobe architect spin off, or the cooper variations on a theme – i always reply that i’d like a printed copy.
so, i printed the woven myrtle instructions this morning, and am using some levenger rings and notebook covers to bind it. my actual printed pre-order myrtle arrived at the post office this afternoon. :)
Sarai
July 16, 2014 #
Got it. :)
Jeri Sullivan
July 16, 2014 #
Normally you would have to choose a bigger size if changing a knit pattern to a woven but since the head opening is so large on this one due to the cowl/drape neckline and the waistband is elastic versus fitted, I think the intention is to stay with the same size as the knit.
Sarai
July 16, 2014 #
I will just agree with the comments above. Because of the wide neckline and positive ease, you can use the same size for both knit and woven in this case.
Za
July 16, 2014 #
Thanks everybody, my first one is finished (even shorter than the short version because I ran out of test fabric), I didn’t change anything and I think the measures are ok!
Elizabeth
July 16, 2014 #
This dress is soooo beautiful, I am truly tempted to snatch it up!!! Thanks for great inspiration!
Rosalyn
July 16, 2014 #
I’m so glad that you used bias tape as a facing. I did the same thing the other day when I was making a shirt in a woven fabric. I’ve been sewing knits so long I got frustrated with the armholes and necklines not turning under perfectly. The next I made a dress with facings easily, but di love the simplicity of using bias tape as facing. Thanks for confirming that I not all the way crazy.
francesca
July 17, 2014 #
For the woven version, I suppose one would have to look at the finished measurements – particularly for the waist – to make sure of the right size group?
Alison
July 17, 2014 #
I am making my first in knit, but I would like to make my next in woven, preferably when the sewalong starts. Does anyone know of any good web sources for silk or rayon crepe?
Erin
July 17, 2014 #
If you do blog tutorials with your hands as part of your job, can you claim manicures as a tax write off?
Sarai
July 17, 2014 #
Haha, I imagine I could.
When I did the photos for my first book, I was instructed to get a manicure beforehand. I definitely expensed that one.
Veronica
July 18, 2014 #
I LOVE this! So soft and feminine! Love your blog <3
Jane
July 21, 2014 #
Thanks so much Sarai for showing this step in pictures. I was trying to work out from the instructions whether it was bound or faced and not being experienced in that technique I was nervous to proceed.
Heidi G
July 23, 2014 #
I’m new to sewing and this is my first dress. I’m (successfully!!) making Myrtle in a semi-sheer cotton fabric. I’m concerned about the sheerness. The top is okay but the skirt definitely needs a lining. The fabric I’m using sticks to itself and is patterned, so using a second layer of that isn’t an option. What kind of fabric would you recommend? Rayon? Also, my plan right now is to cut the same pattern pieces (no pockets) and insert the second layer with a separate and slightly shorter hem, joining the outer and lining at the waistband… sound good? Thank you!
Sarai
July 23, 2014 #
Yes, that sounds perfect!
For fabric, there are tons of lining options to choose from. I like natural fibers for linings generally. A rayon lining fabric (like bemberg rayon) is nice and breathable. If your outer fabric is a sheer cotton, you might look for a light cotton for the lining, perhaps in a skin tone or to match the outer fabric.
Rachel
July 29, 2014 #
Excited to make this as I was just in the process of trying to trace my beloved cowl Tshirts! A question: as a busty gal (UK bra size GG cup) and a beginning sewist, my first (daunting) task is mastering FBA’s. I’ve noticed that some of the cowl neck Ts that I own and love have drag lines between the boobs, so I guess the positive ease on the cowl isn’t a guarantee (maybe my apex is lower?). So…if I were to do an FBA on the Myrtle (without a dart) might I end up with side seams similar to the plus size patterns? I’m eyeing that curvy side seam and thinking it might be just the thing I need…but the rest of me is an L. Thoughts? Any plans for a sewalong with pattern modifications?
Sarai
July 29, 2014 #
Yes, we are planning to do a sewalong starting early August, and I’ve asked Devon to include info about small and large bust adjustments!
Rachel
July 30, 2014 #
Yay!! Thanks :)
Mochi
August 1, 2014 #
I want to make this as a present for a friend, but I want to be sure I can definitely do it before I bring it up.
She’s very into the Day of the Dead, so I thought I’d try to make this in a sugar skull fabric. But all of the Day of the Dead fabrics I’ve seen are wovens, 44-45″ wide. She’s on the larger side of the size spectrum and with the Myrtle, it looks like I’ll have to use 60″ fabric if I go above a size XL.
Does anyone have any good ideas about how I could alter the pattern to accommodate narrower fabric?
I’m somewhere between beginner and slightly advanced beginner, so I’m not very experienced with altering patterns other than moving a dart here and there, but I’m happy to learn some new skills!
Thanks for any help!
Sarai
August 1, 2014 #
Hi Mochi! The main issue in the larger sizes is the width of the skirt. The hem is wider than 44″ fabric will allow above a size XL.
It should be easy for you to work around this if you’d like to try. Here are a few ideas:
1) Add a panel down the center front and center back. Just cut the pattern apart to create two separate pieces from each skirt, and add seam allowance to each panel.
2) Buy extra fabric. Instead of cutting your pieces on two layers at once, cut them on a single layer of fabric, fitting the pieces in like a puzzle. You will need to cut the skirt front in two pieces and add a seam down the center front (so be sure to add seam allowance there). This does take more fabric, and will be tricky if your print is directional.
3) Shorten the skirt and then add a flounce at the bottom for length – in the same fabric or a contrasting fabric. You could cut the flounce on the cross grain, or in multiple pieces to get the most from your fabric.
4) Because the skirt is too wide at the hem, Add a diagonal seam going from the hem to the side seam, effectively cutting off a triangle of the pattern at the bottom of the skirt. Cut this triangle separately and then sew it back at the skirt bottom to re-create the fullness of the skirt. This can look really cute. Many bias-cut garments have diagonal seams like this in order to fit on fabric when they’re cut.
Nicole
August 5, 2014 #
I just wanted to make sure that I’m using the right bias tape… I’m a noob! Your instructions above say to use 1/4 in double fold bias tape, but the printed Myrtle instructions call for single fold. I think the images above are single fold, but I wanted to check here before I went shopping! Thanks so much for all these detailed, helpful instructions!
Sarai
August 5, 2014 #
Either will work, actually, but I think single fold is pretty hard to come by at only 1/4″! Thanks for pointing out the discrepancy, I’ll update the instructions to say double fold.